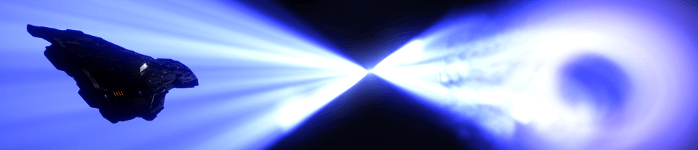
The neutron stars and white dwarfs have a specificity: they have two jet cones diametrically opposed.
Moving the ship inside these cones has an effect that depends on the active mode of flight:
- In Supercruise, this allows to supercharge the FSD, thus greatly increasing its jump range
- + 50% for a white dwarf (x 1.5)
- + 300% for a neutron star (x 4)
- In any case, the FSD module will take some damage (about 1% per supercharge).
- In normal space this is very dangerous due to the power of the jet cone
- It causes poor maneuverability of the ship because it is strongly shaken, making the exit difficult (jumping in supercruise)
- It causes continuous damage to the modules and the hull
- It causes the ship to heat up, which increases the damage further
Using the jet cones to supercharge the FSD:
- Is therefore very useful (especially with neutron stars) to allow much faster travel in the galaxy
- Does not present any danger as long as we stay in supercruise
- But it is absolutely necessary to avoid dropping in normal space while in the cone
How to supercharge your FSD without risk
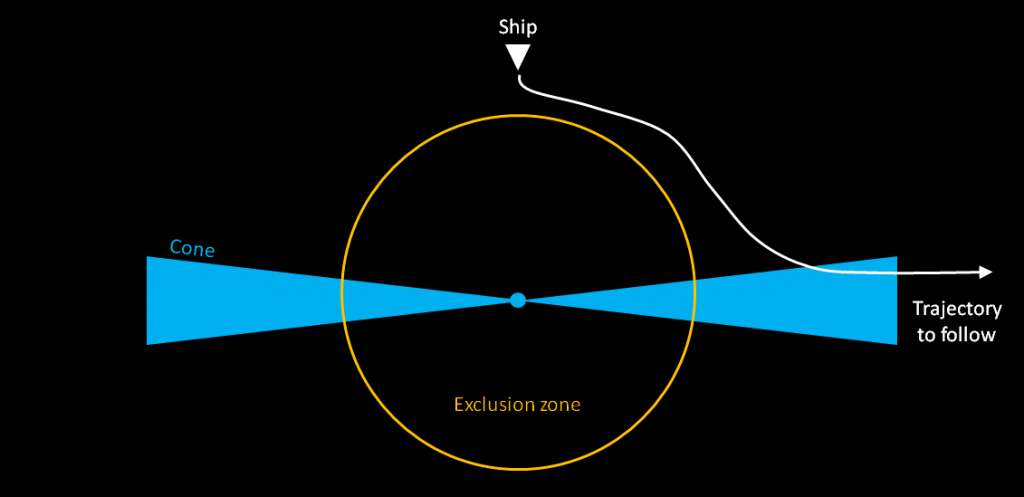
When one arrives in a system where the main star is a neutron star or a white dwarf, one is facing the star, with the cones on both sides overall perpendicular to our trajectory.
The risk-free strategy is therefore to aim at the end of the cones, far from the star itself, in order to avoid the exclusion zone:
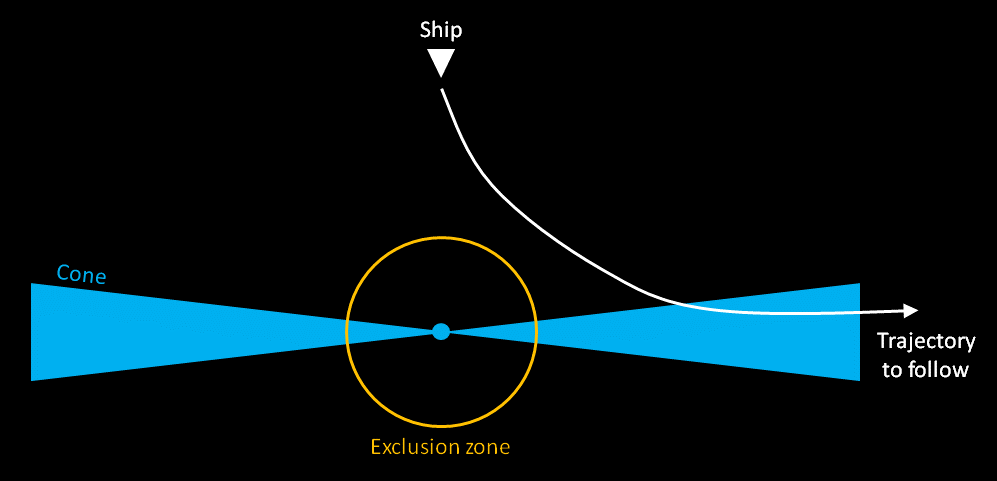
To ensure success
- It is prudent (in any case when starting with neutrons) to set the engines to zero during the hyperjump when jumping to a neutron star, to prevent having speed when arriving at the neutron.
- Avoid the exclusion zone, otherwise you have an emergency stop (normal one, outside of the cone), which will force you to start all over again.
- Then it is necessary to reduce one’s speed when arriving near the cone, in order to be able to enter tangentially, to prevent coming out immediately on the other side.
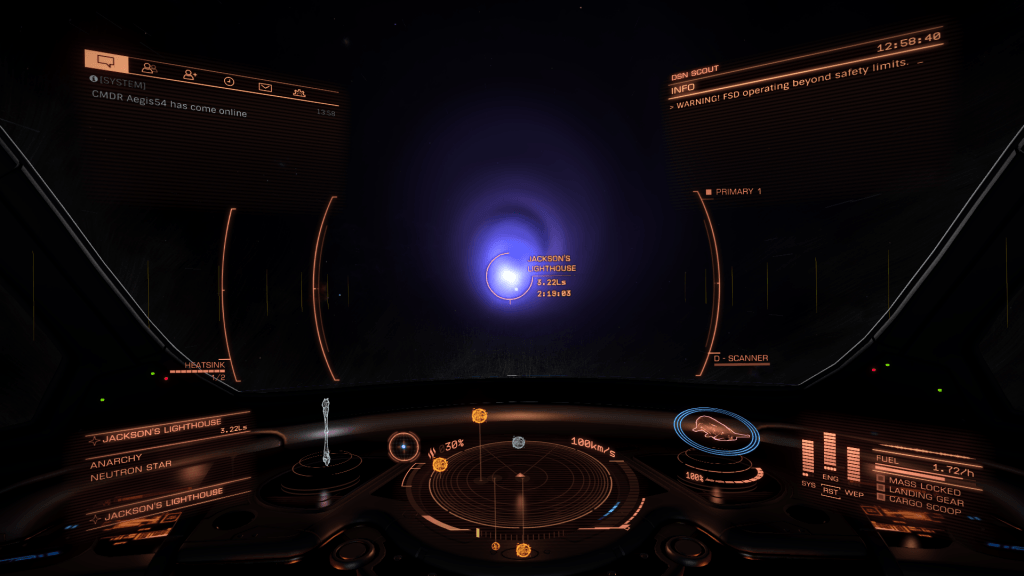
- We know that we are in the cone when the red message appears, indicating that the FSD is operating beyond safety limits. The ship is also tossed.
- Once in the cone it is necessary to set the engines to zero, in order to give the FSD time to supercharge (about ten seconds)
- When the FSD is supercharged, a blue message appears in the information panel (top right).
- It is then time to get out of the cone by heading towards its wide end (away from the star).
Example in video
It is important to understand that the exclusion zone itself poses a serious danger ONLY inside the cones:
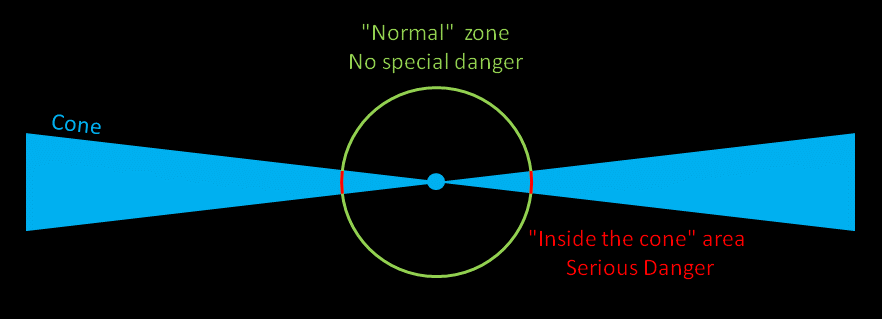
What must therefore be avoided at all costs is a trajectory in the cone directed towards the star
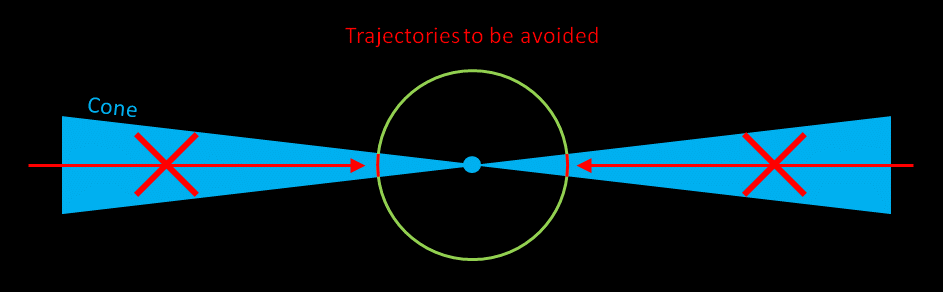
If you have the following view this means that you must turn around
So if you come out of the cone too early, take the time to move away from the star, and resume a good trajectory, and avoid facing it with the cone in the axle.
White Dwarf case
The white dwarfs have the specificity of having a very large exclusion zone relative to the cones (we drop closer too). The strategy is the same but you have to be especially careful and aim as far as possible towards the wide end of the cone. Moreover, the supercharge is much less efficient (only + 50%).
Sometimes you have to fly a bit parallel to the cones before going down, to be sure to avoid the exclusion zone.
On the other hand they are generally aesthetically very beautiful.
Trace its route with neutrons
Once the Supercharge method is controlled, it is possible to optimize one’s journeys using neutron stars significantly.
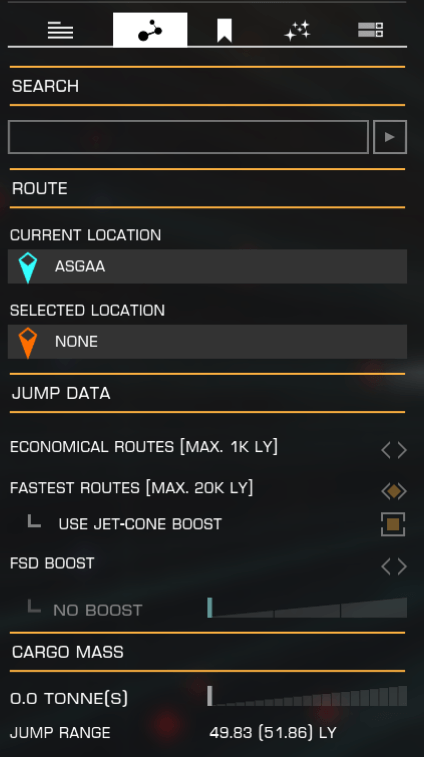
The route plotter of the game is able to use them when they are on the route. For this it is necessary to activate the option “Use Jet-Cone Boost“.
Another option is to use the Neutron Router website, which allows the generation of routes that maximize the use of neutron stars (from neutrons scanned by the community):
- When the neutron star density is low, the Neutron Router is much more effective than the ingame plotter.
- However in the neutron-rich areas this is of no interest.
- For the Neutron Router you have to do tests by varying efficiency, to get the shortest route. In general the optimum is between 60 and 80% in efficiency.
Equipment and vigilance points
In case of significant use of neutron stars it is necessary to:
- Take an AFMU module
- In fact, each supercharge reduces about 1% of the FSD module integrity
- Below 80% The module starts to fail, which slows down the journeys considerably, because it is necessary to wait for it to return to come back online
- Approximately all 20 supercharges or so it is necessary to drop in normal space (outside of cones!), and repair one’s FSD.
- Have sufficient fuel capacity
- No less than 3 jumps, ideally 5 or more
- In fact, it is possible to chain many neutrons in a row in a neutron-rich zone (which are not scoopable)
- Before each jump, check that we are not going to run out of fuel
- If in doubt, plot a scoopable system near the next neutron
- Or reload in a secondary scoopable stars orbiting neutron stars
Note that the ingame plotter regularly plots scoopable stars to avoid running out of fuel.